Business GuideGet Started with KarmaLink
Everything you need to know to set up your business account, add properties, manage your team, and start tracking customer karma scores.
In This Guide
Create Your Business Account
Getting started with KarmaLink takes just a few minutes. Visit the sign-up page and fill in your business details to create your account.
Free trial included!
KarmaLink is free until January 2027. After that, it's just £5 per property per month. Payment details are collected during signup but you won't be charged until the trial ends.
What you'll need:
- Business Name — your legal business name
- Business Type — e.g. Restaurant, Bar, Cafe, Brewery
- Business Email — this becomes your login username
- Owner Name — first and last name of the account holder
- Payment Method — a credit or debit card (not charged during the free trial)
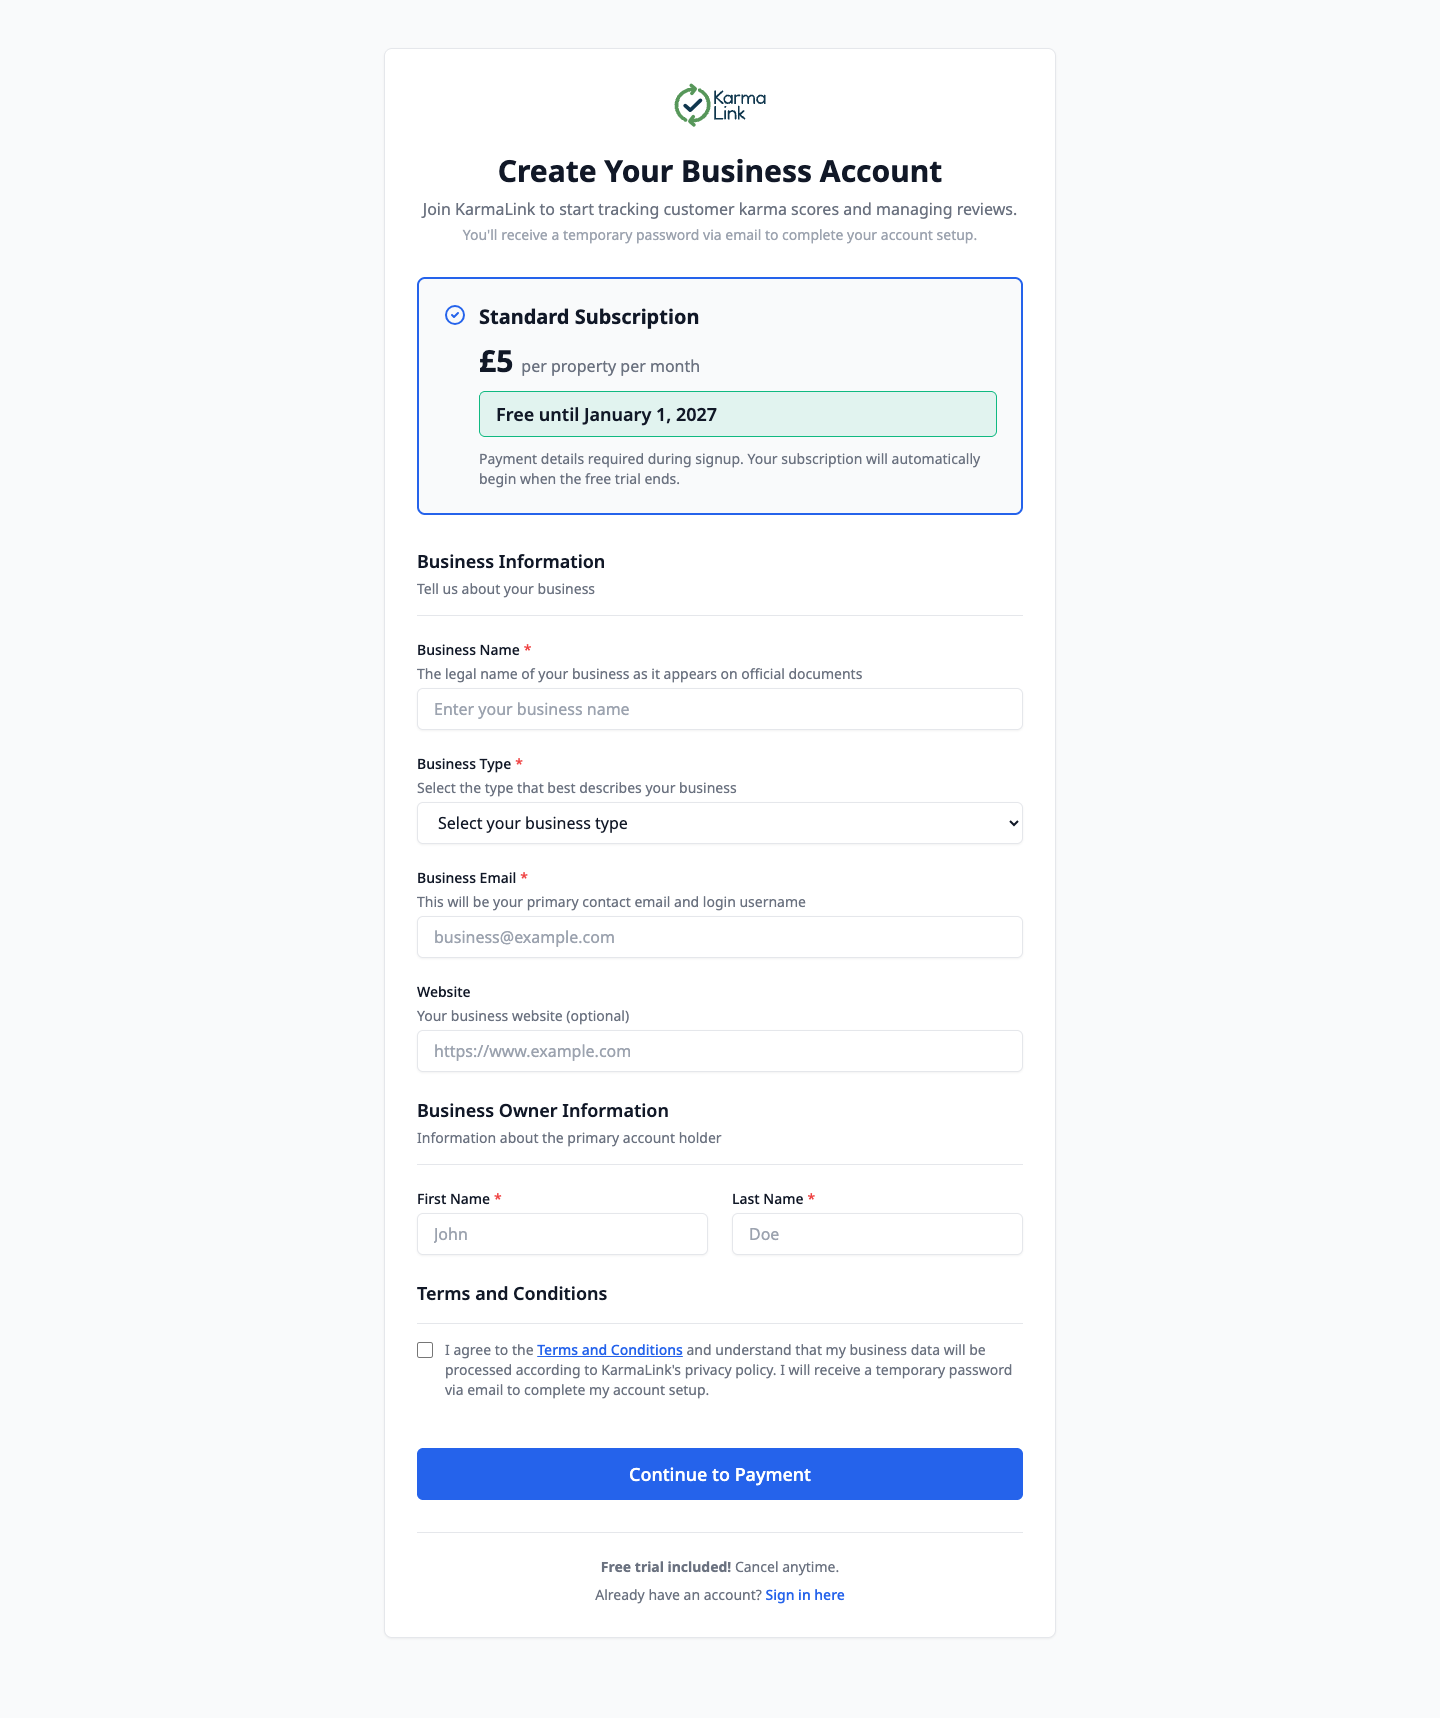
After signing up, you'll receive a temporary password via email. Use this to sign in for the first time, and you'll be prompted to set a new password.
Your Dashboard
Once signed in, you'll land on your business dashboard. This is your central hub, showing an overview of your properties, team, bookings, and no-show statistics.
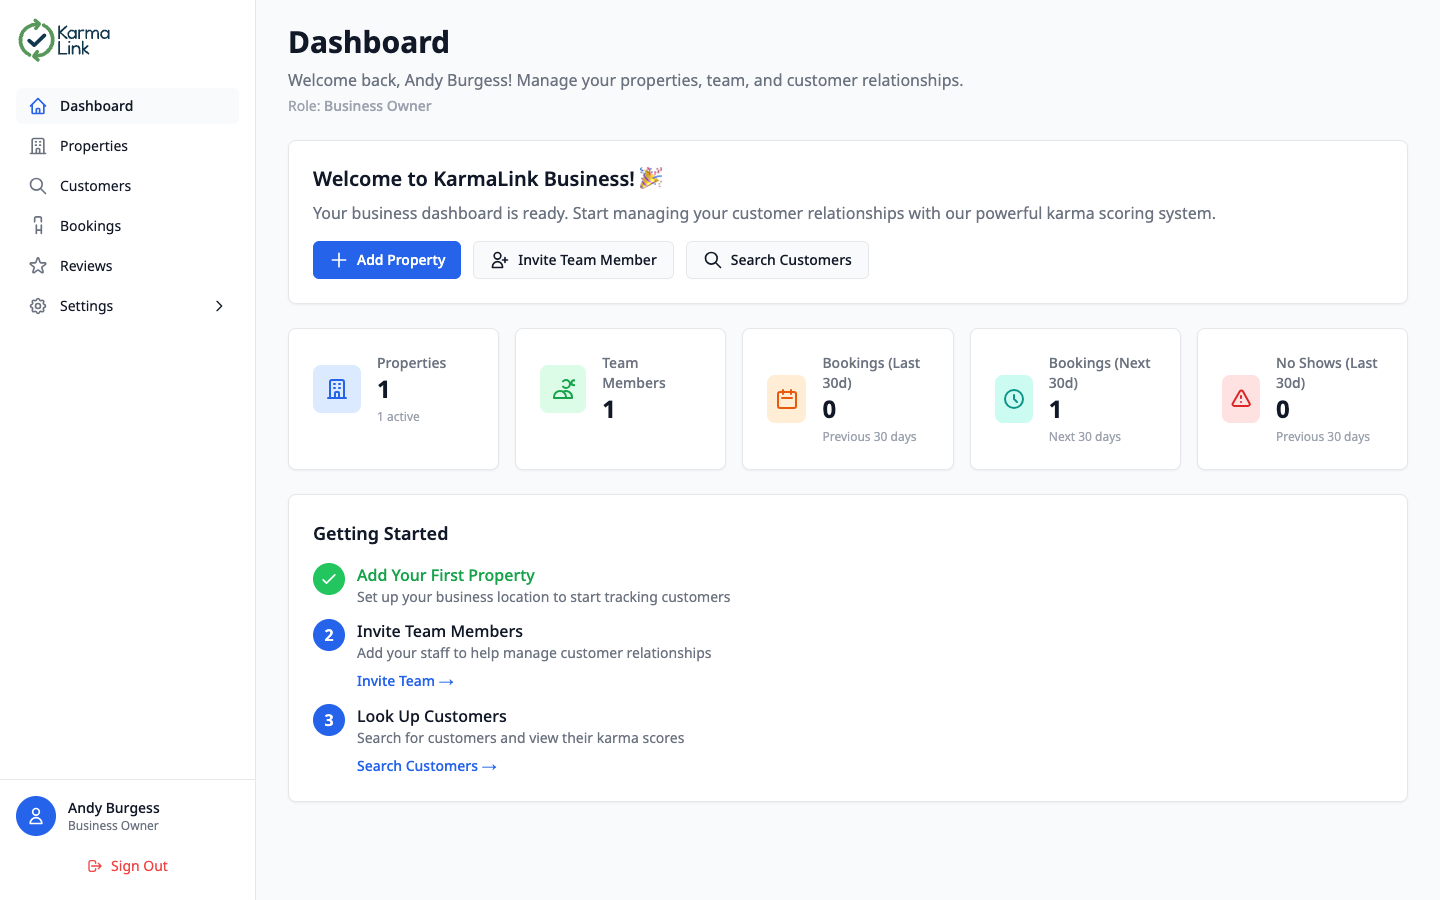
Dashboard features:
- Quick Actions — buttons to add a property, invite a team member, or search customers
- Stats Overview — at-a-glance counts for properties, team members, recent bookings, upcoming bookings, and no-shows
- Getting Started Guide — a step-by-step checklist to help you set up your account
Tip: Click on any stats card to jump directly to a filtered view. For example, clicking “Bookings (Last 30d)” takes you straight to the bookings page filtered to the past 30 days.
Managing Properties
Properties represent your physical business locations — restaurants, bars, cafes, or any other hospitality venue. Each property can have its own integration, address, and customer data.
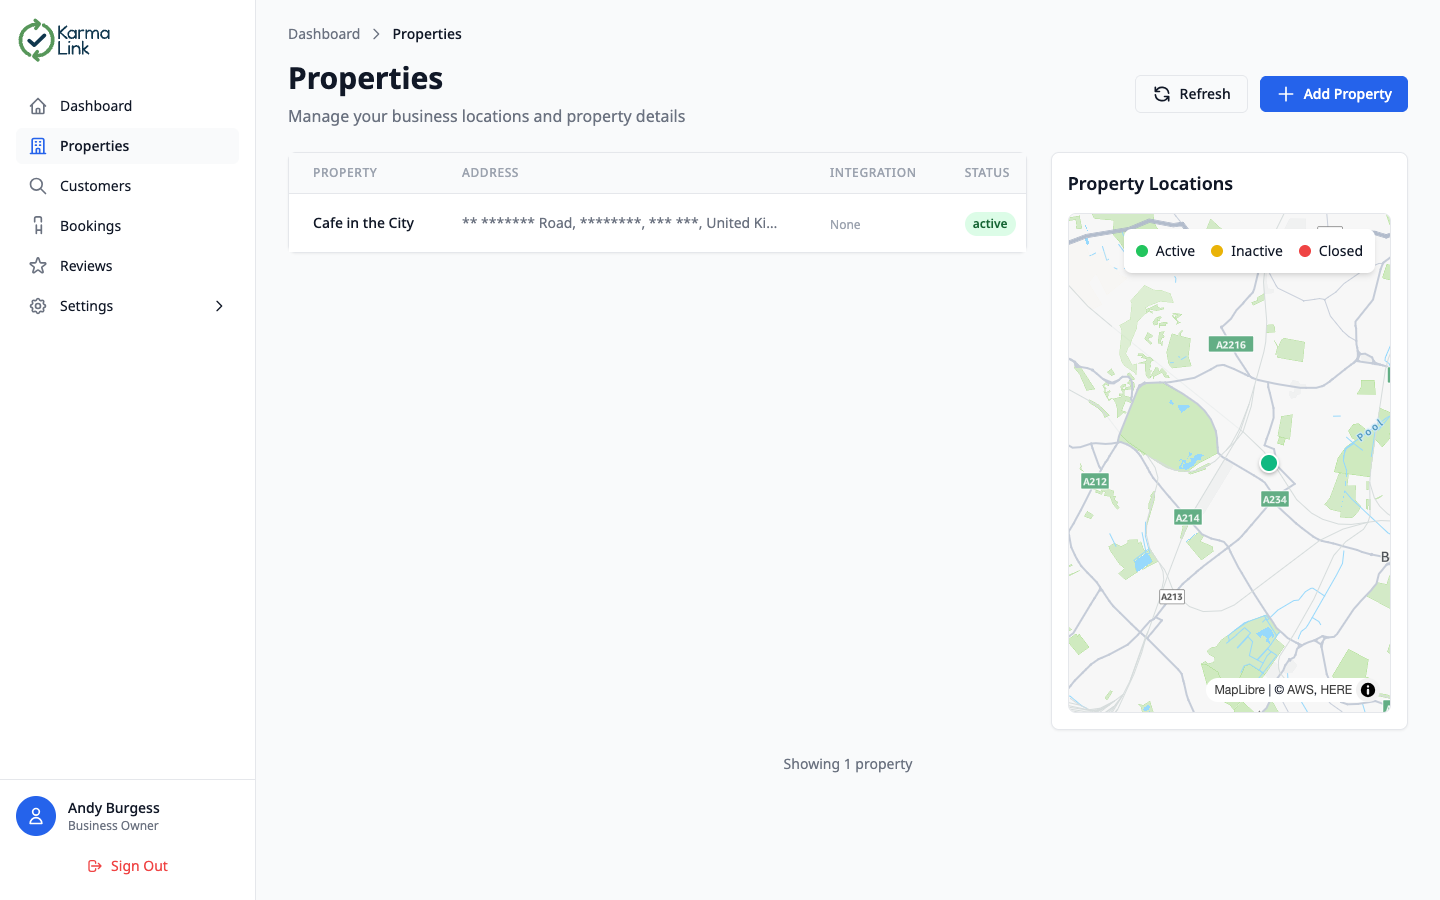
What you'll see:
- Properties Table — name, address, integration type (e.g. ResOS, Email), status, and creation date
- Property Map — interactive map showing all your property locations with colour-coded pins (green = active, yellow = inactive, red = closed)
- Click to View — click any property row to see full details, edit, or manage its integration
Adding a New Property
Click the “+ Add Property” button from the Properties page or the Dashboard to register a new location.

Property details to provide:
- Property Name — the name of your venue
- Property Email — contact email for this location
- Phone Number — optional contact number
- Business Address — start typing and select from address suggestions powered by AWS Location Services
- Property Category — optional classification (e.g. Fine Dining, Casual, Pub, Cafe)
Billing note: The subscription impact section shows how adding a property affects your billing. Each property costs £5/month (free during the trial period). Your subscription adjusts automatically.
Property Detail & Analytics
Click any property in the list to open its detail page. Here you'll find a comprehensive overview of analytics, property information, location, and integration configuration.
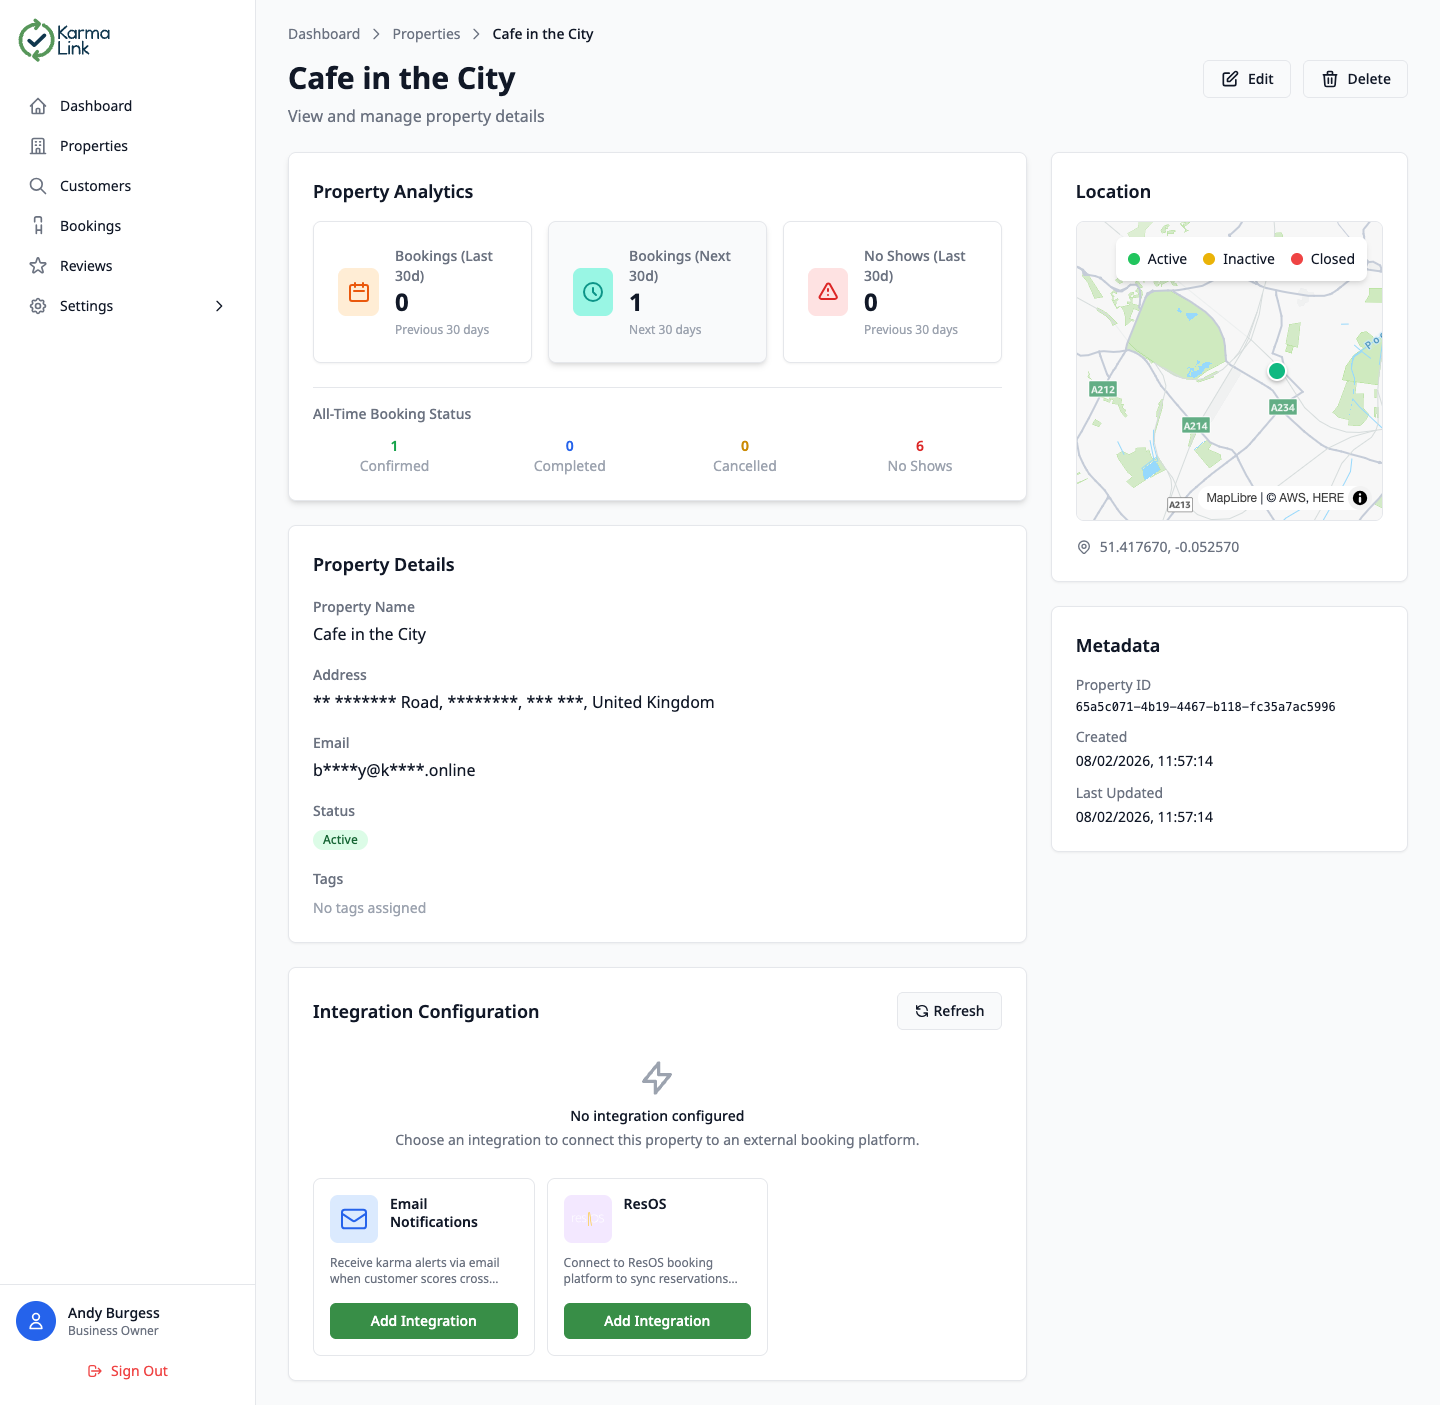
What you'll see:
- Property Analytics — bookings in the last 30 days, upcoming bookings, no-shows, and all-time booking status breakdown (confirmed, completed, cancelled, no-shows)
- Property Details — name, address, contact email, status (Active/Inactive/Closed), and tags
- Location Map — interactive map showing the property's exact position with colour-coded pins
- Metadata — property ID, creation date, and last updated timestamp
- Edit & Delete — use the top-right buttons to update property details or remove the property
Tip: The analytics section updates in real time as bookings are synced from your integration. Use it to spot trends like increasing no-show rates for a particular venue.
Property Integrations
Integrations connect your properties to external booking platforms, enabling automatic syncing of reservations and customer data. You'll find the Integration Configuration section at the bottom of each property's detail page.
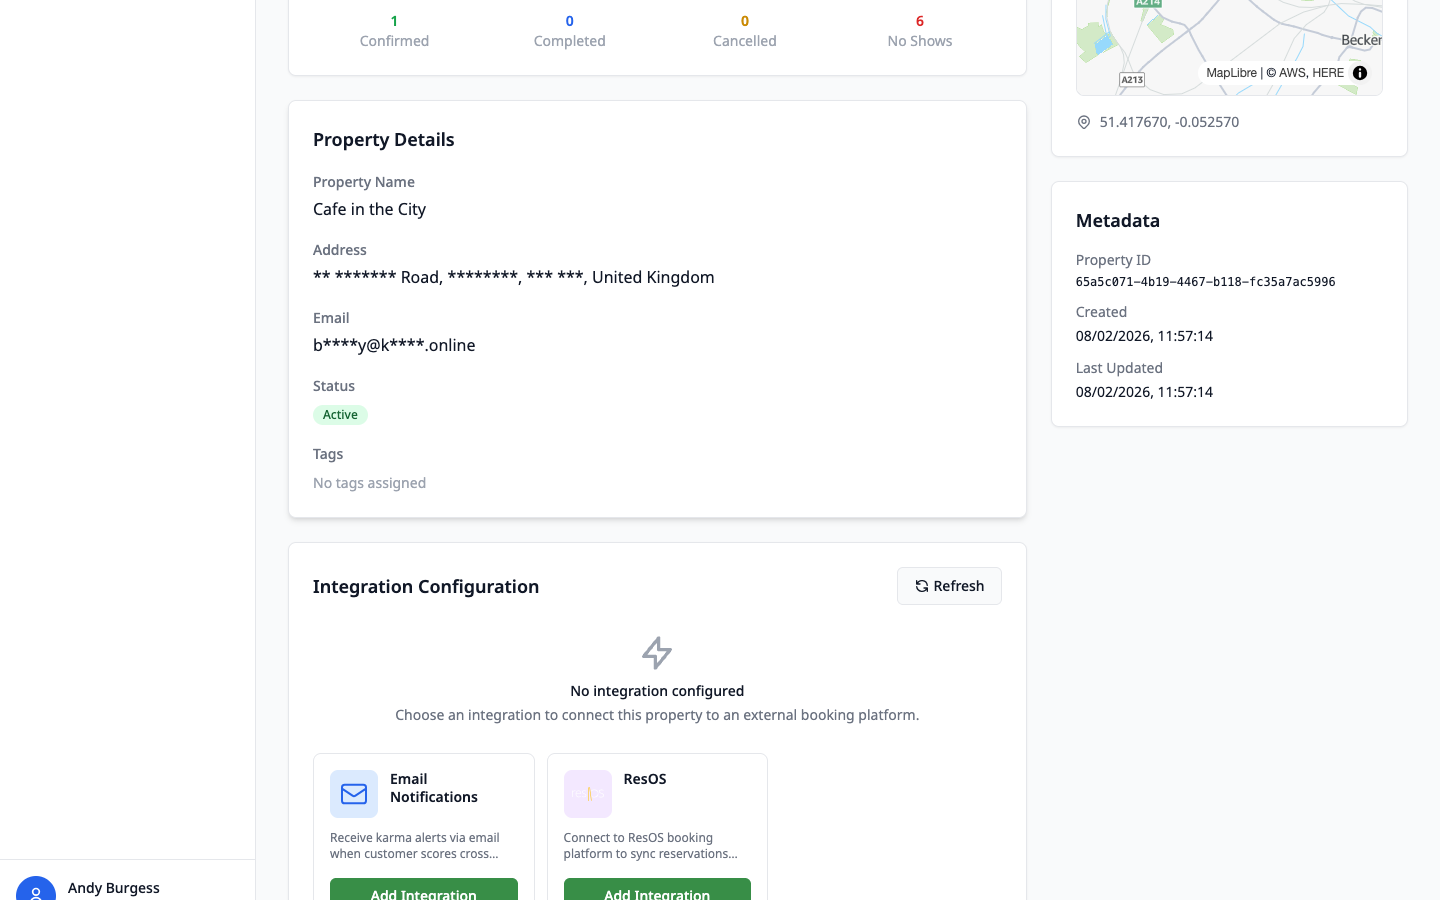
Available integration types:
Email Notifications
Receive karma alerts via email when customer scores cross configurable thresholds. Set up forwarding rules to notify staff about high-risk or VIP customers.
Best for: venues that want automated alerts without a booking platform integration
ResOS
Connect to your ResOS booking platform to automatically sync reservations, track no-shows, and monitor customer behaviour across bookings.
Best for: restaurants and venues using ResOS for reservation management
How to add an integration:
- Navigate to Properties and click on the property you want to configure
- Scroll down to the Integration Configuration section
- Choose either Email Notifications or ResOS and click “Add Integration”
- Fill in the required configuration (e.g. API key for ResOS, or notification email for Email)
- Click “Save” to activate the integration
Note: Each property can have one active integration at a time. If you need to switch from ResOS to Email (or vice versa), you'll need to remove the current integration first using the “Change Integration” option.
Managing Your Team
The Team page lets you view and manage everyone who has access to your KarmaLink business account. You can see their name, email, role, status, and when they joined.
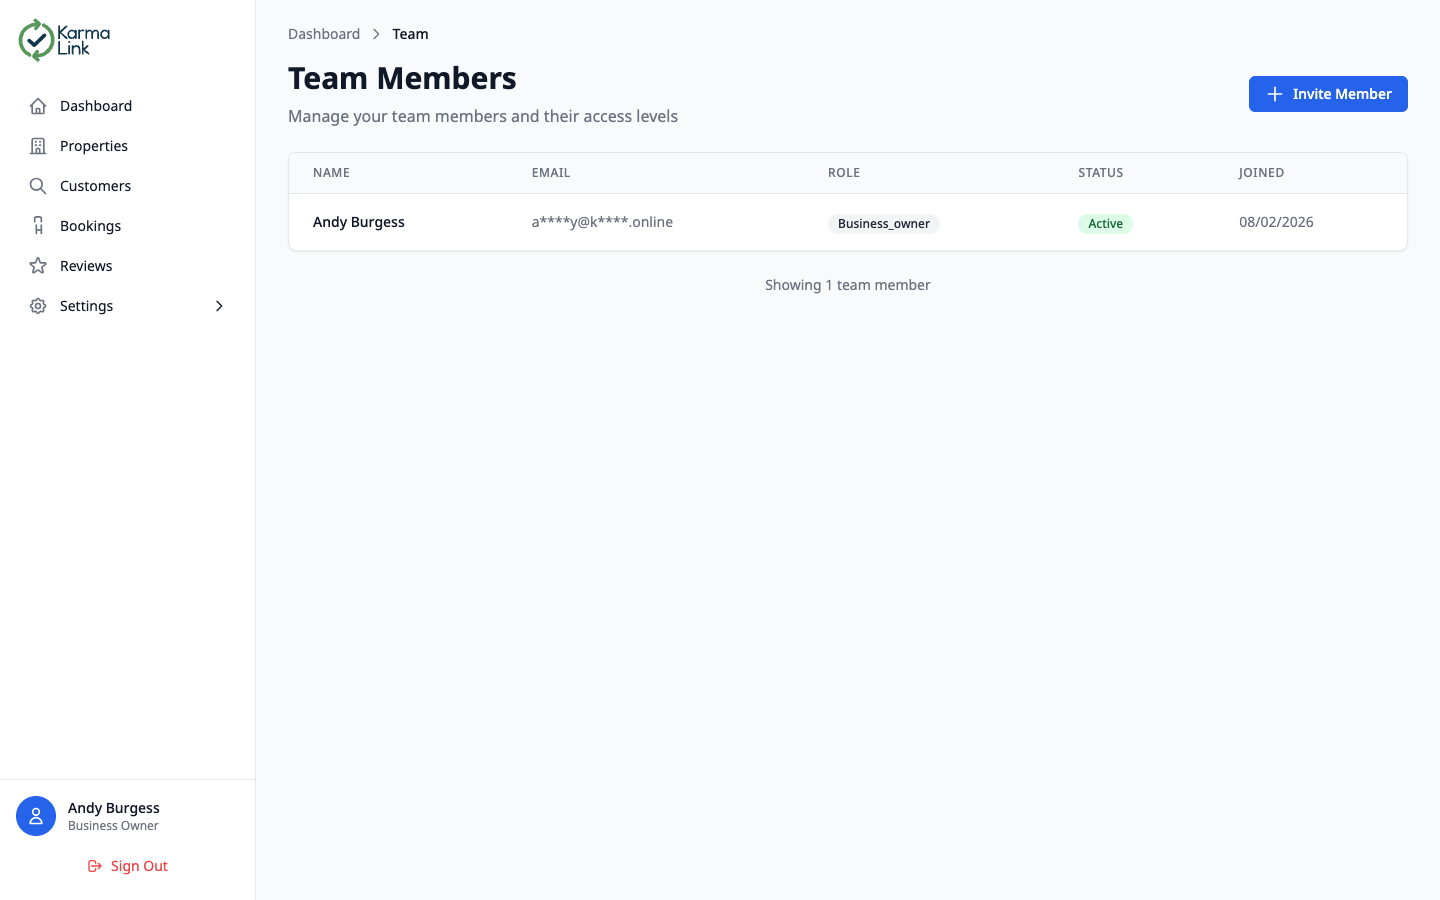
Team member information:
- Role badges — colour-coded roles: Owner (purple), Admin (blue), Editor (green), Viewer (grey)
- Status — Active (green), Pending (yellow for invited but not yet logged in), or Inactive
- Click to manage — click any team member to update their role or remove them
Inviting Team Members
Click “+ Invite Member” from the Team page to add a new team member. They'll receive an email invitation with a temporary password to get started.
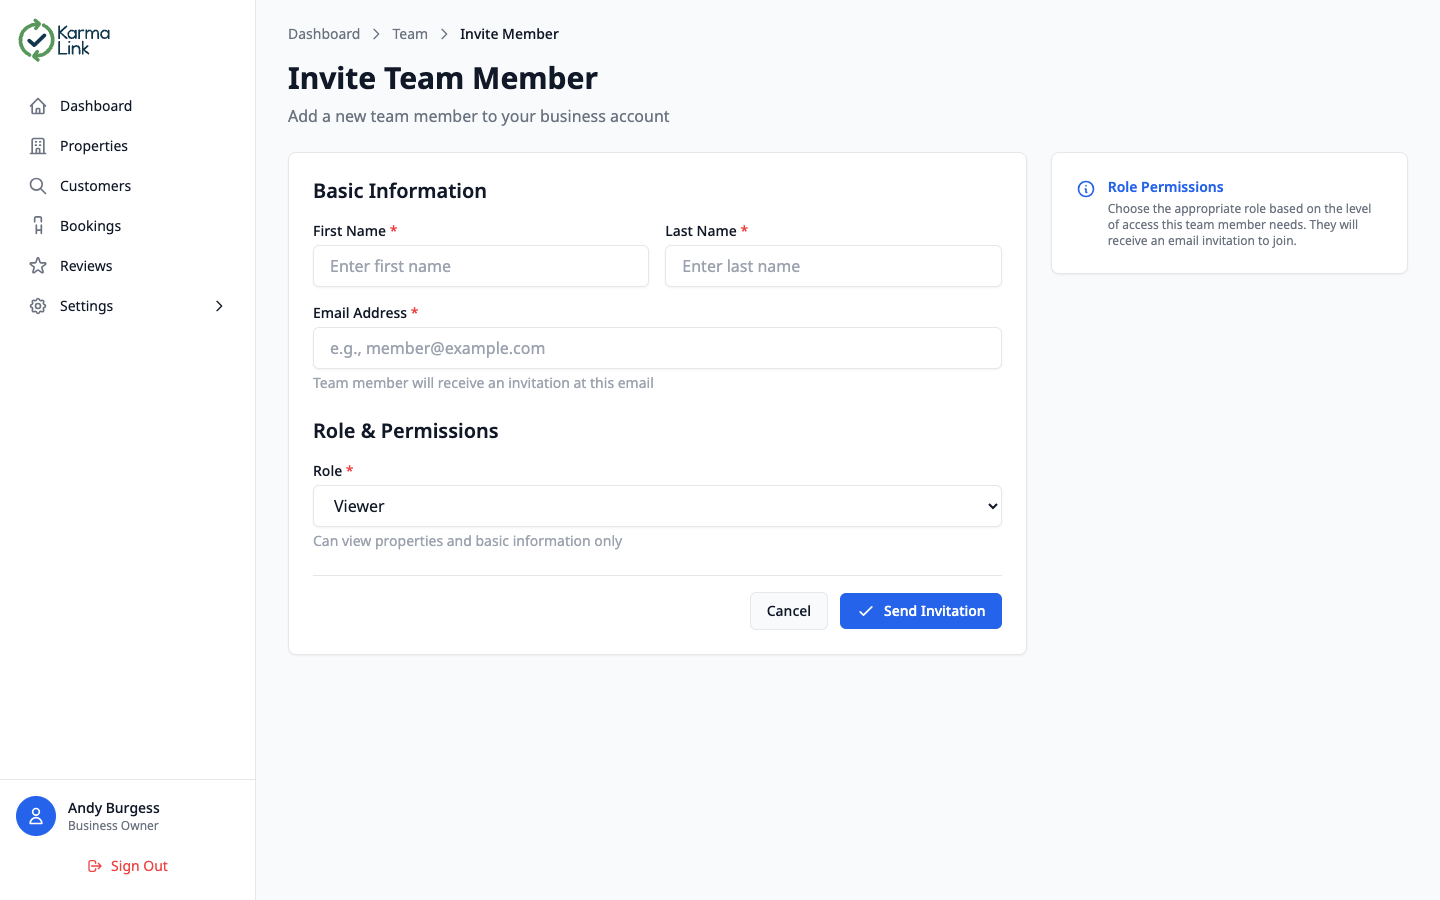
Invitation details:
- First & Last Name — the new member's name
- Email Address — they'll receive their invitation at this address
- Role — choose the appropriate access level (see Roles & Permissions below)
Customer Lookup & Detail
The Customer Lookup page is where you search for customers by their email address or hashed email to view their karma score, booking history, reviews, and AI-generated insights.
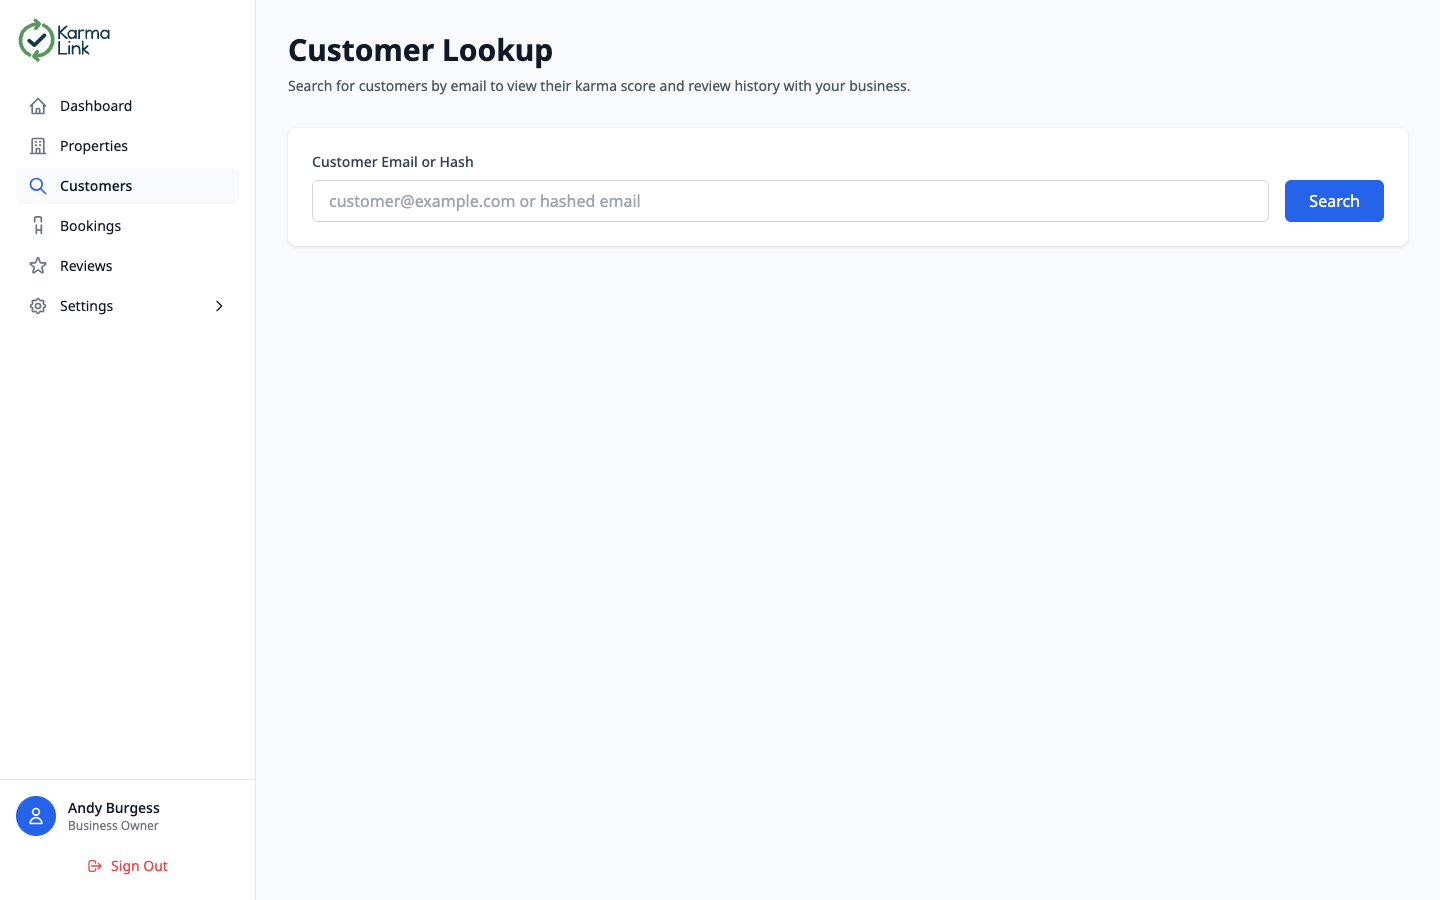
Enter a customer's email address or their SHA-256 hash and click “Search”. You'll see a full breakdown of the customer's history with your business:
Customer Information Card
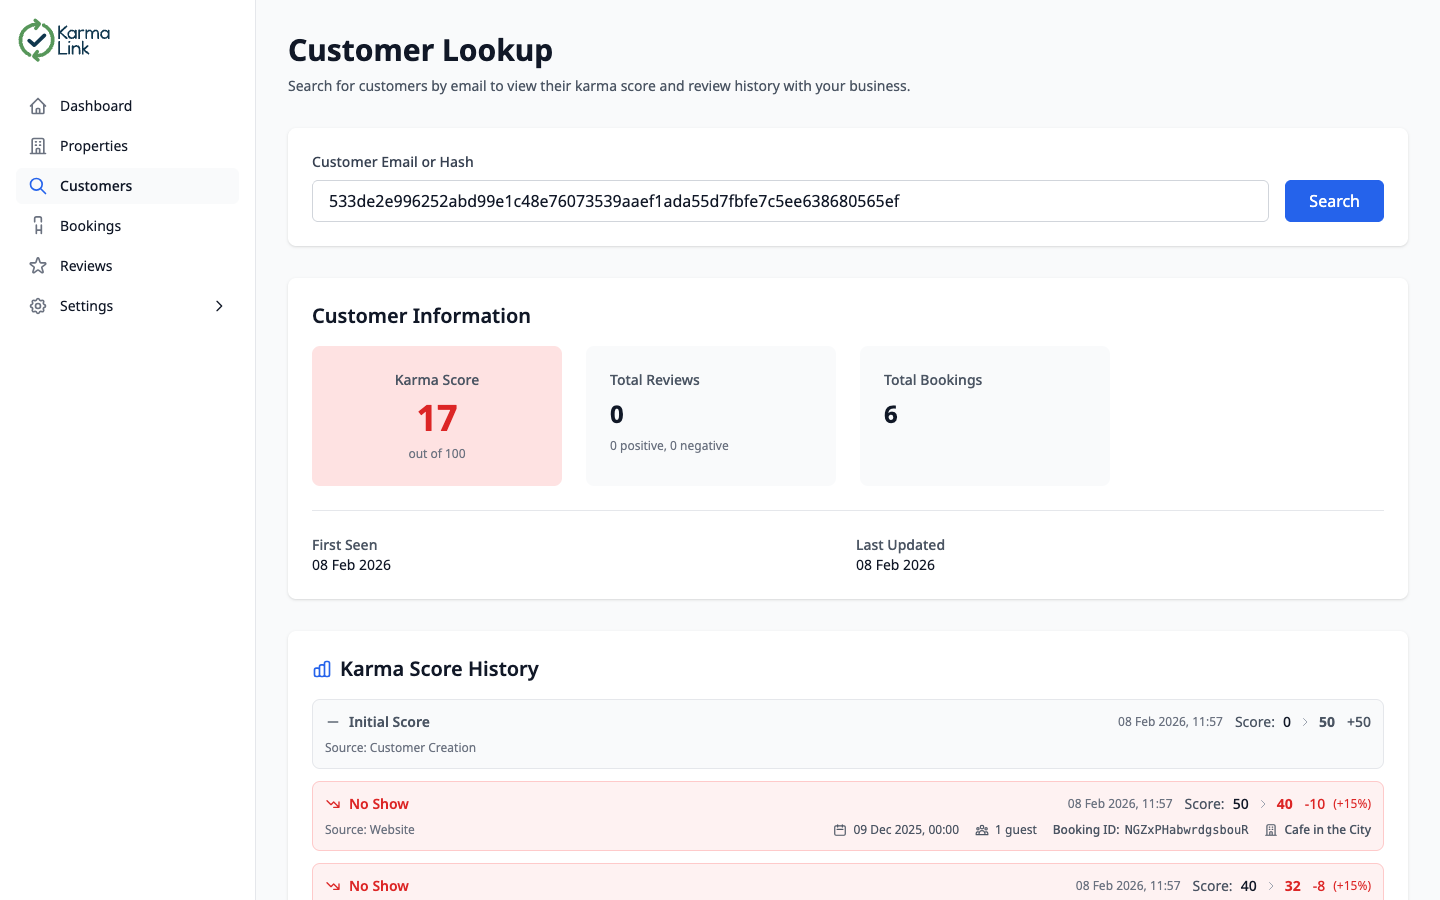
- Karma Score — the customer's current reputation score (0–100), colour-coded: red (below 40), yellow (40–69), or green (70+)
- Total Reviews — how many reviews have been submitted for this customer, with positive vs. negative breakdown
- Total Bookings — the total number of bookings associated with this customer
- First Seen & Last Updated — when the customer first appeared and their most recent activity
Karma Score History

The Karma Score History is a detailed timeline showing every event that affected the customer's score. Each entry includes:
- Event type — colour-coded: Initial Score, No Show (red), Completed Booking (green), Review (positive/negative)
- Score change — shows the previous score, the change amount, and the new score with percentage impact
- Source details — booking date, guest count, booking ID, and which property the event occurred at
AI-Generated Customer Summary & Assistant
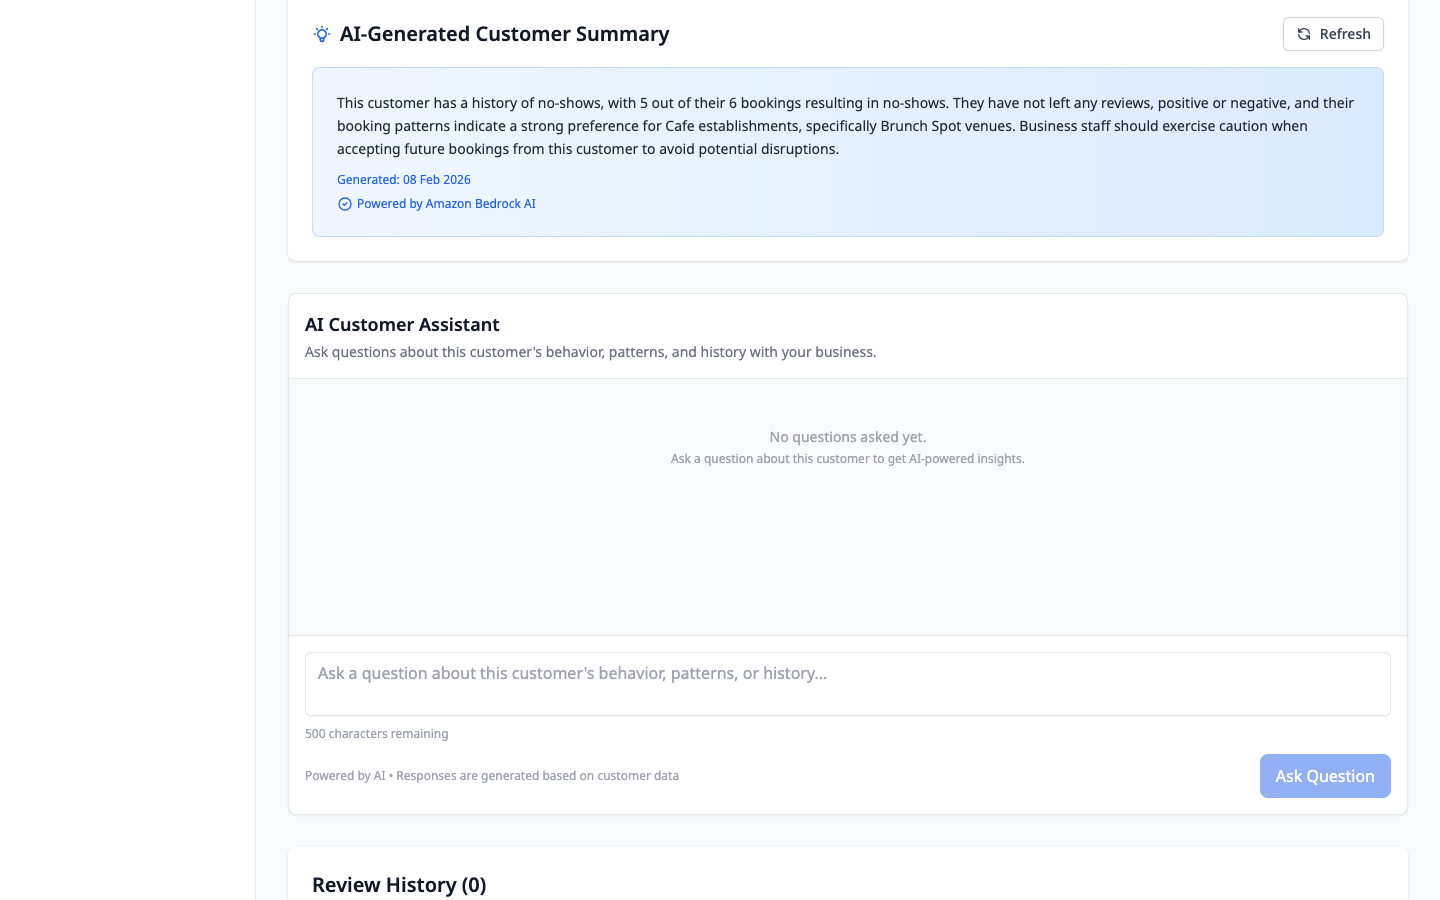
Powered by Amazon Bedrock AI, the AI summary analyses the customer's full history and provides an intelligent behavioural summary. It highlights patterns like frequent no-shows, preferred venue types, and recommendations for your staff.
The AI Customer Assistant lets you ask natural-language questions about the customer, such as “How many times has this customer been a no-show?” or “What venues do they usually book?” — and receive AI-powered answers based on their data.
Privacy first: Customer emails are hashed using SHA-256. You can search by email (which is hashed on lookup) or directly by the hash. KarmaLink never stores plain-text customer email addresses.
Viewing Bookings
The Bookings page shows all customer bookings across your properties. You can filter, sort, and search to find exactly what you need.
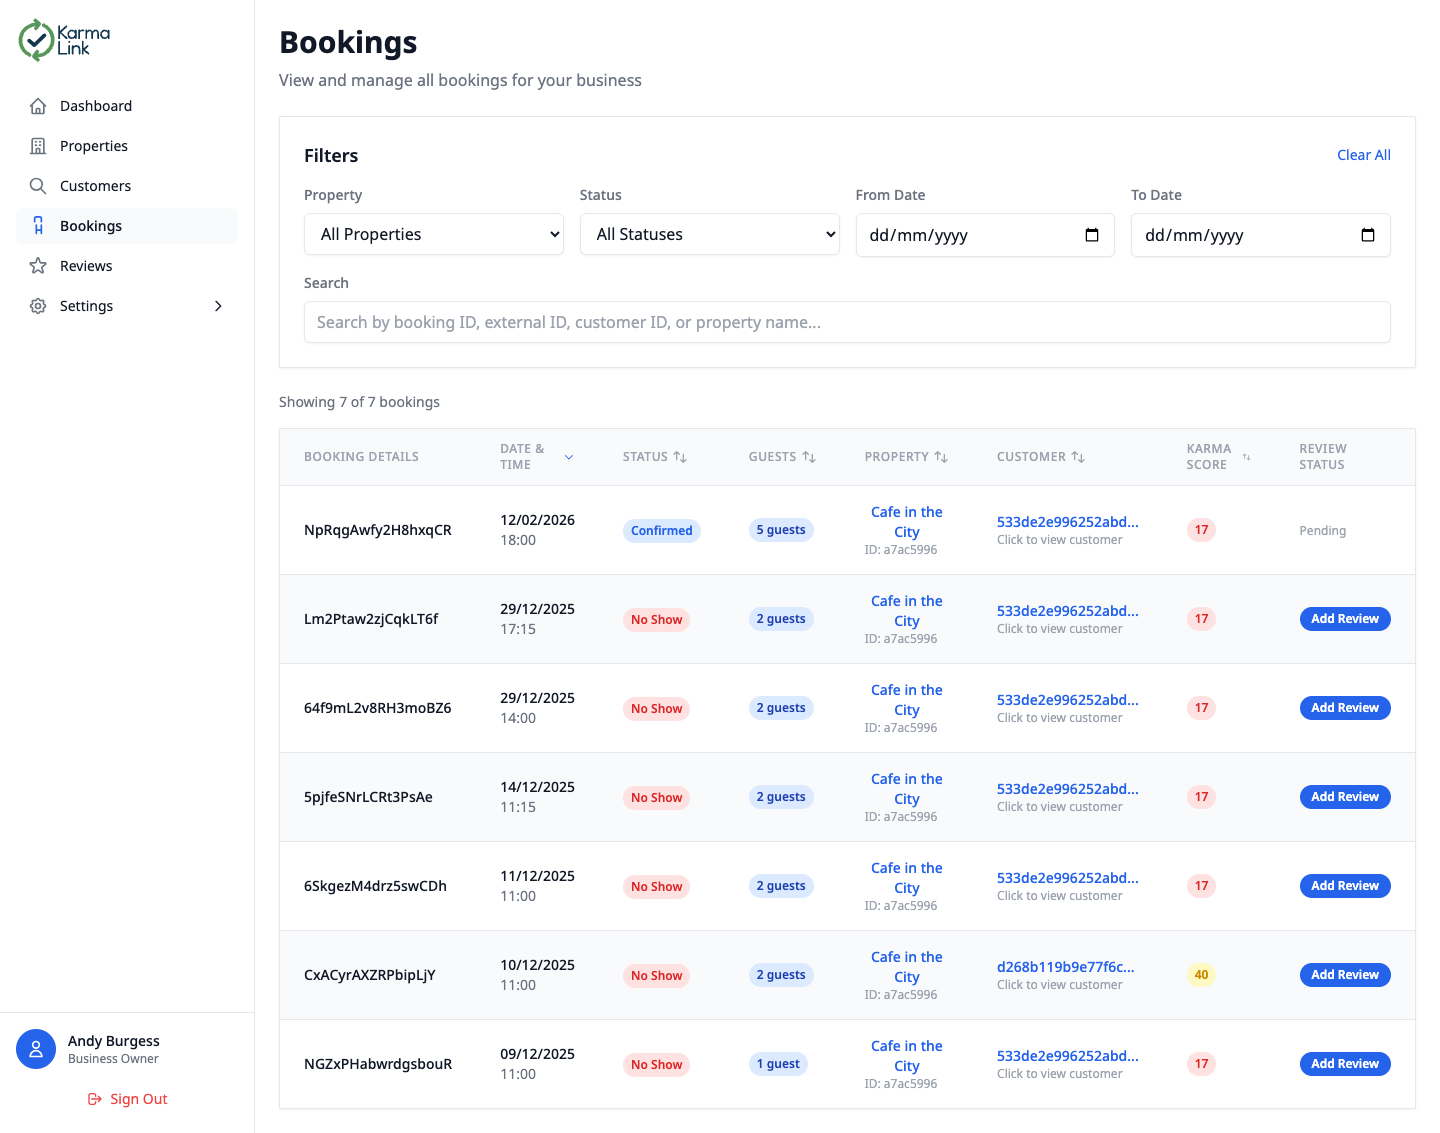
Booking features:
- Filters — filter by property, status (Confirmed, Completed, No Show, Cancelled), and date range
- Search — search by booking ID, external ID, customer ID, or property name
- Sortable columns — click any column header to sort ascending or descending
- Karma Score — see the customer's karma score at a glance for every booking
- Review Status — quickly see if a review has been submitted or if one is pending
- Click customer links — click the customer hash to jump to their full customer profile
Tip: Bookings are synced automatically from your integrated reservation system (e.g. ResOS). No manual entry required!
Managing Reviews
The Reviews page lets you view all customer reviews submitted by your team and submit new ones. Reviews directly impact customer karma scores.
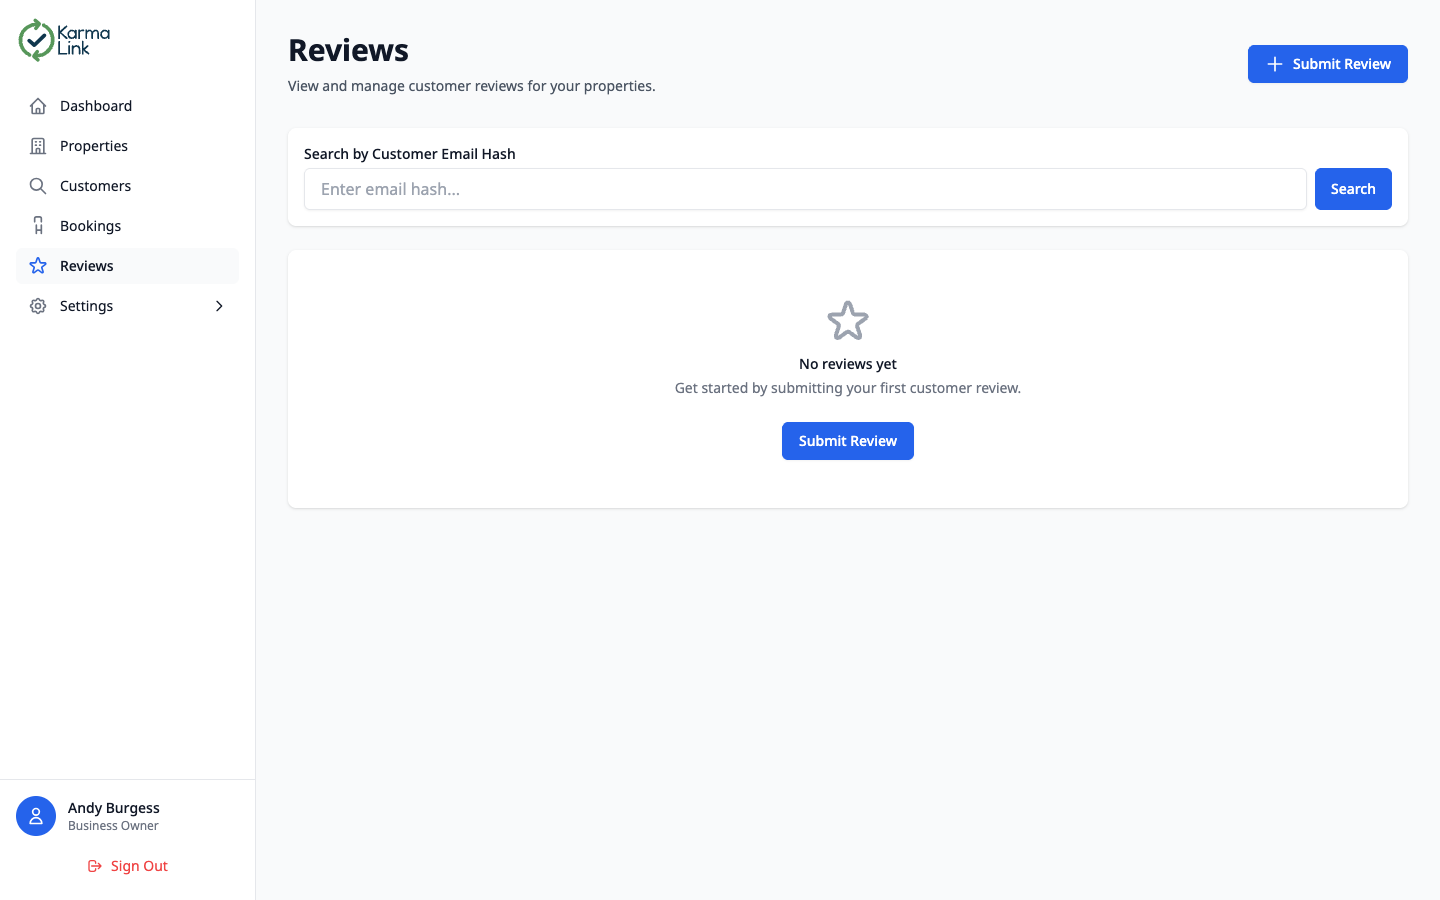
Review types:
Increases karma score. E.g. great customer, always on time.
No score impact. For noting general observations.
Decreases karma score. E.g. no-show, rude behaviour.
You can also submit reviews directly from the Bookings page by clicking the “Add Review” button next to any booking.
Subscription & Billing
The Subscription page shows your current plan, billing status, and lets you manage your payment methods through the Stripe Customer Portal.
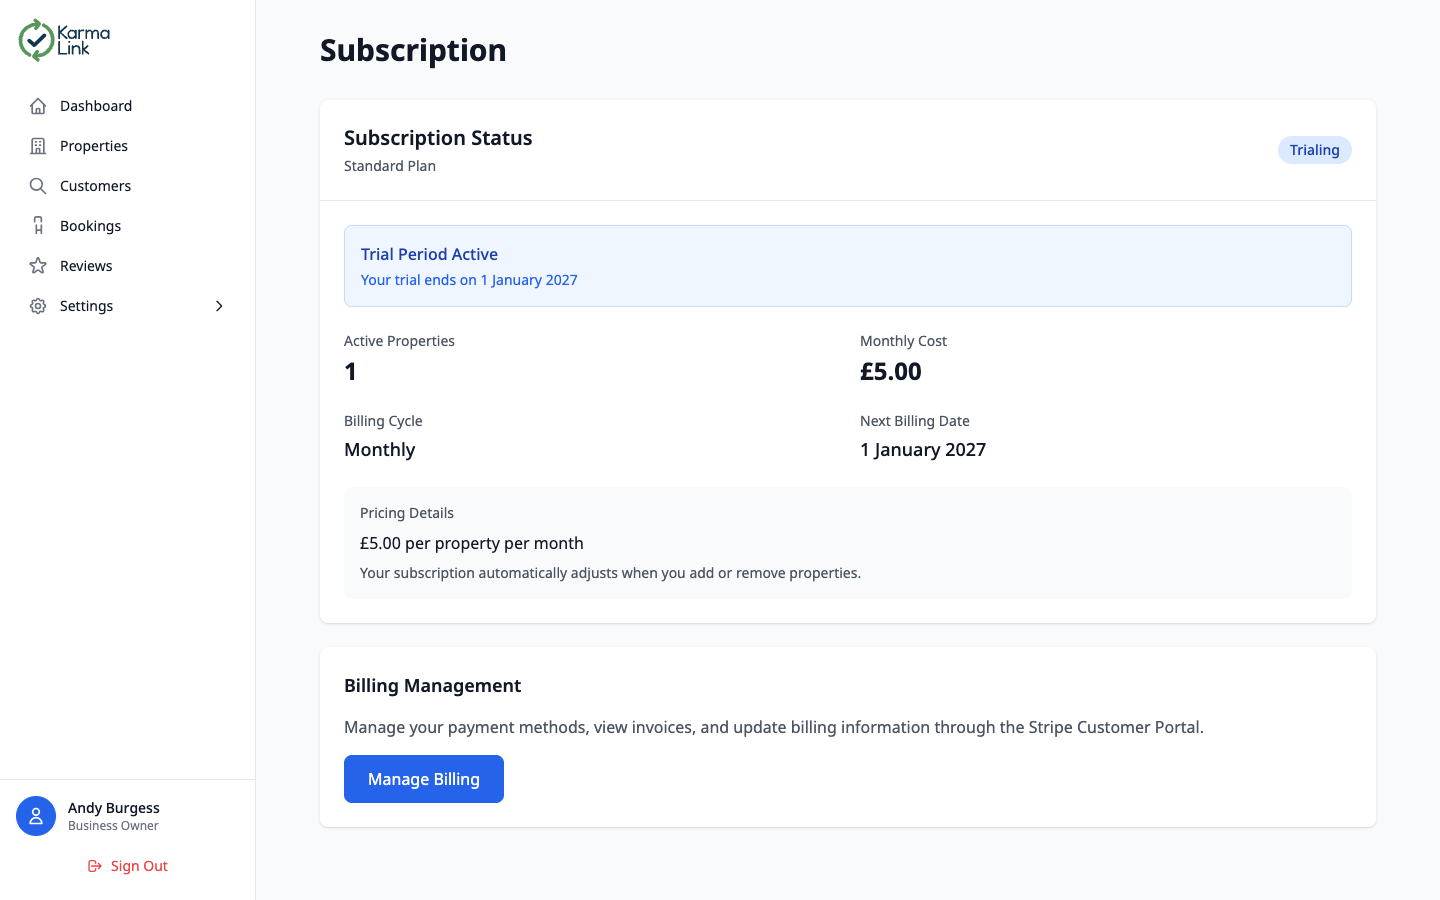
Subscription details:
- Plan Status — shows whether you're on a trial, active, or cancelled
- Trial Period — highlighted banner showing when your trial ends
- Pricing — £5.00 per property per month. Your bill adjusts automatically as you add or remove properties
- Billing Management — click “Manage Billing” to access the Stripe Customer Portal where you can update payment methods, view invoices, and manage your subscription
Settings
The Settings page provides access to your business configuration. From here you can manage your business profile and application preferences.
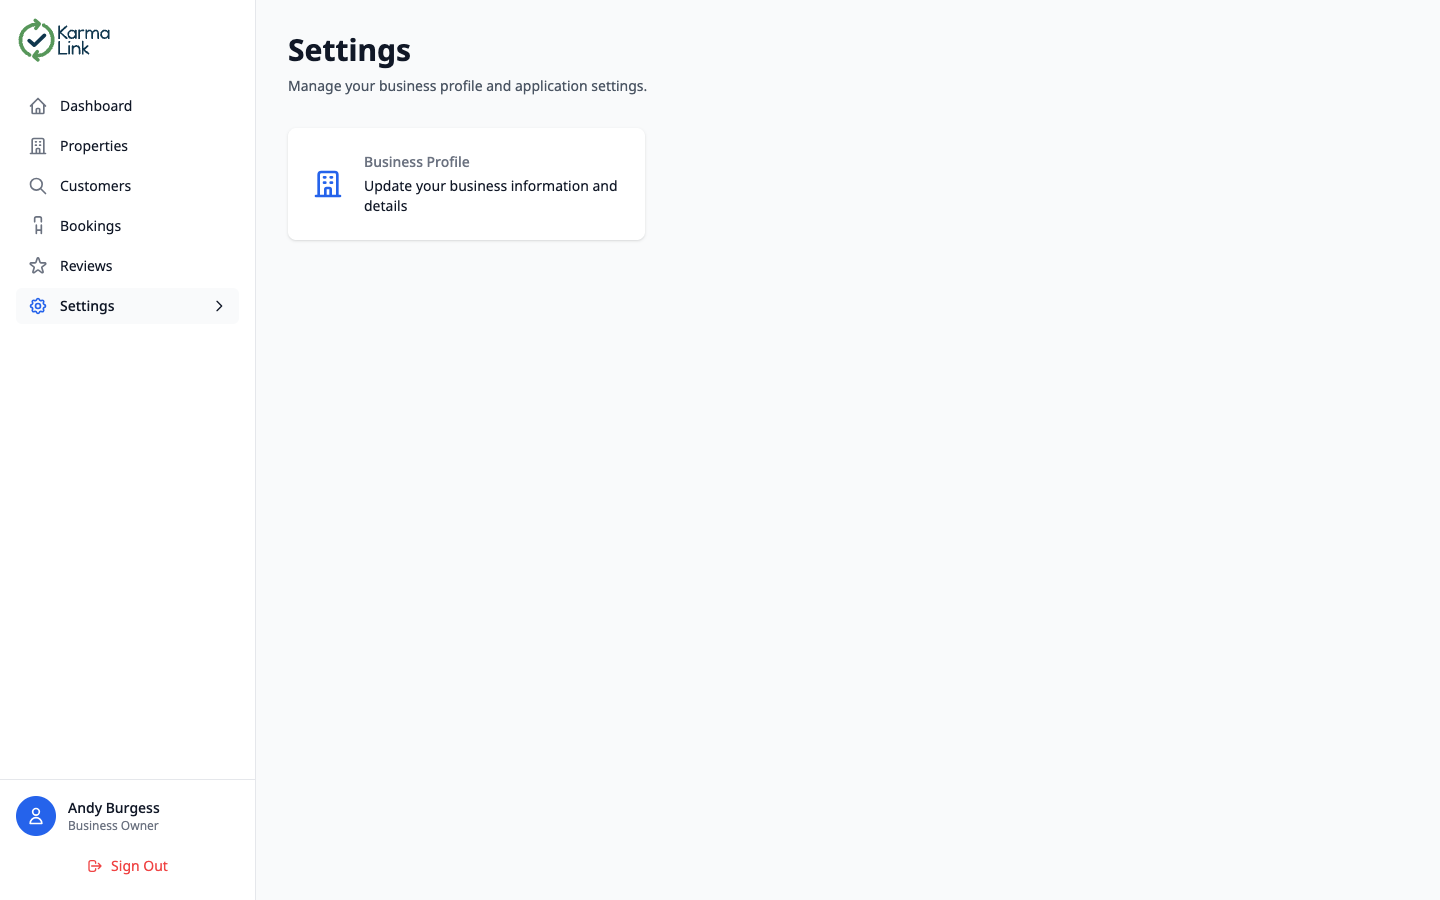
Available settings:
- Business Profile — update your business name, type, and other core information
- Team (via sidebar) — manage team members and roles
- Subscription (via sidebar) — manage billing and subscription status
User Roles & Permissions
KarmaLink uses role-based access control to ensure team members only see and do what's appropriate for their position. There are four roles available:
| Permission | Owner | Admin | User | Viewer |
|---|---|---|---|---|
| View dashboard & analytics | ||||
| View properties & customers | ||||
| Manage properties | ||||
| Submit reviews | ||||
| Manage team members | ||||
| Export data | ||||
| Manage subscription & billing | ||||
| Delete business |
The Business App Navigation
The KarmaLink Business Portal features a sidebar navigation for easy access to all sections:
Ready to Get Started?
Create your free business account today and start managing customer reputation across all your properties. Free until 2027!